get your bunny ears!
Only a few more days till Easter! But not to worry! I've got a freebie bunny ears printable that you can download and make and you'll be festive in no time!

It's such an easy project - it literally takes 1 minute to make. Just download, print, cut and fold!
Here's my friend Amy's adorable son, Alfredo modeling the ears for you! Thank you Alfredo for being such a good sport! Don't miss Amy's fabulous blog here!
CLICK HERE TO DOWNLOAD THE BUNNY EARS PRINTABLE! -- file is approx 2MB
To download from the preview widget above, click the arrow button on the bottom right. This will save the high res file to your computer and you will have beautiful bunny ears ready to print and enjoy! :)
Links to this freebie printable on pinterest, twitter, facebook etc are very much appreciated! Spread the word!
For more fun Easter, Spring (and any occasion printable kits) that you can download and make check out my Etsy store here!
Don't miss any freebies! Make sure to sign up for my email list here:
Labels: free printable
spring stamp giveaway
I've got a giveaway for you over on the Paper Crafter's Library blog! Make sure to hop on over to the Paper Crafter's Library to enter to win my Spring Garden stamp sheet, read my featured artist interview and tips and a few cards I made too! Yay!

Labels: giveaway
how to make a recycled paper bird nest
I've got a fun spring tutorial for you today! It's an easy to make nest out of recycled paper and Multi Medium. By using Multi Medium instead of white glue you can create this nest using less layers of paper! Makes for a very quick project!

Here are a few little birdies from my Paper Bird Printable kit looking right at home sitting in the nest!You can also use your nest for Easter eggs too! Read on to see how I created mine!

Shred old book pages and brown paper bag in your shredder. Cover a bowl with plastic wrap. I didn’t have any plastic wrap so I used a plastic grocery bag and it worked great!


Continue until you’ve covered the bottom of the bowl and little bit of the sides. Once you have a smooth layer of shredded papers on, add a final coat of multi medium and sprinkle on another layer of shredded papers so that it give the outside a messy birds nest look.
 Paint a few craft store wooden eggs to place inside! Here I painted eggs using Claudine Hellmuth Studio paints in Blank Canvas, Painterly Pink, Dash of Red, Yellow Pastel and Sky Blue mixed with Classic Teal
SUPPLIES USED FOR THIS PROJECT:
Old book pages and brown paper bags
Small bowl
Plastic wrap or plastic grocery bag
affiliate links
Here are a few little birdies from my Paper Bird Printable kit looking right at home sitting in the nest!You can also use your nest for Easter eggs too! Read on to see how I created mine!
Shred old book pages and brown paper bag in your shredder. Cover a bowl with plastic wrap. I didn’t have any plastic wrap so I used a plastic grocery bag and it worked great!
Apply Multi medium to your surface and glue on shredded papers
Continue until you’ve covered the bottom of the bowl and little bit of the sides. Once you have a smooth layer of shredded papers on, add a final coat of multi medium and sprinkle on another layer of shredded papers so that it give the outside a messy birds nest look.
SUPPLIES USED FOR THIS PROJECT:
Old book pages and brown paper bags
Small bowl
Plastic wrap or plastic grocery bag
affiliate links
Labels: Claudine Hellmuth Studio, free projects, free tutorial
whimsical paper bird ornaments
I've got another spring printable kit in my Etsy shop!

I created these little whimsical paper bird ornaments to be used as centerpiece decorations for Easter, but then while I was working on them I thought they could also be used for Weddings (how cute as a cake topper!), Baby showers or just to add a little whimsy to your home!
I also made a how-to video to help you assemble them!
 Our Brian cat seems to think that they can also make great cat toys too! Here's an Instagram I took of him "helping" during my photo shoot. He decided he really loved these birds and wanted one to play with. I finally gave in and let him have one (after the photo shoot of course!)
I created these little whimsical paper bird ornaments to be used as centerpiece decorations for Easter, but then while I was working on them I thought they could also be used for Weddings (how cute as a cake topper!), Baby showers or just to add a little whimsy to your home!
I also made a how-to video to help you assemble them!
Labels: printable kits
tattered inspiration & a giveaway!
Tim Holtz is having a super fun blog hop and giveaway with his lovely Tattered Florals Die! I've got a tutorial for you and then look for the GIVEAWAY at the end of this post!
 For my project using the Tattered Florals Die, I created a Sticky Back canvas brooch that you can pin to a necklace, to your scarf or jacket!
SUPPLIES:
Tim Holtz Sizzix Tattered Florals die
Claudine Hellmuth Studio Stick Back Canvas in Natural 8.5x11"
Claudine Hellmuth Studio Painterly Pink paint
Claudine Hellmuth Studio Multi Medium
Ink Blending tool with foam
Button
Pin Back
Sand paper


THE GIVEAWAY DETAILS:
A big Thanks to Tim Holtz, for being so generous and sending me a Tattered Florals die to GIVEAWAY to one of you!
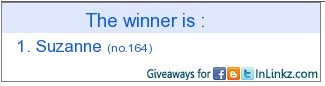
UPDATE WE HAVE A WINNER! winner has been picked! Congrats to Suzanne!! We'll have another giveaway very soon! thanks for playing!

UPDATE WE HAVE A WINNER! SCROLL DOWN TO SEE WHO WON!
SUPPLIES:
Tim Holtz Sizzix Tattered Florals die
Claudine Hellmuth Studio Stick Back Canvas in Natural 8.5x11"
Claudine Hellmuth Studio Painterly Pink paint
Claudine Hellmuth Studio Multi Medium
Ink Blending tool with foam
Button
Pin Back
Sand paper
affiliate links
Start with a piece of 8.5x11" Natural Sticky Back Canvas and print a handwriting image onto it using your inkjet printer
Peel off the backing paper from the Sticky Back Canvas
Fold it in half so both sides stick together
Cut using the Tattered Florals die on your die cutting machine
Sand the edges of your Sticky Back Canvas Flowers to distress them by rubbing the edges on sandpaper
Squeeze out a small amount of paint onto your Craft Sheet
Using the ink blending tool, dip the foam into the paint and then brush lightly over the edges of the flower.
Scrunch up the flowers to give them dimension. Then set the flower pieces aside. Now we are going to make the center of the flower!
Cut a 2" square piece of Sticky Back Canvas and a 1" x 11" long strip. Make a small cut in the top of the strip of Sticky Back Canvas
Tear the strip of Sticky Back Canvas in half lengthwise
Peel off the paper backing from the square of Sticky Back canvas and leave the adhesive side facing up
Take the long strip of Sticky Back canvas and remove the paper backing, stick one end to the adhesive side of the canvas square.
Start rolling up your flower by twisting one 1/2 turn and then sticking the strip of canvas into the adhesive side of the canvas square in a circular motion.
Keep twisting and sticking and it will look like this!
Trim off the excess canvas around the flower
Lightly tap on a little bit of Painterly Pink paint using the link blending tool
Apply Multi medium to the center of the largest flower
Layer up all the flowers, adding Multi Medium in between each layer.
Add a button using Multi Medium to the center of your flower
Add a pin back to the back of the flower. I glued mine on with more Multi Medium!
Pin your flower to an old necklace and wear! Or pin it to a scarf, a hat or a jacket!
THE GIVEAWAY DETAILS:
UPDATE WE HAVE A WINNER! winner has been picked! Congrats to Suzanne!! We'll have another giveaway very soon! thanks for playing!
Labels: free projects, free tutorial, giveaway
spring printable kits!
I've got some fun printable kits over in my etsy shop to get you ready for spring!

These little Happy house favor boxes can hold favors and gift cards!

My printable Church favor box goes perfectly with the happy houses so you can make an Easter village for your mantle! You can also use this little church for weddings or baptism parties too!

Add my Sweet Treat train with Easter eggs in the back to your Easter display and you have a super cuter spring theme!

Once Easter is over you can use your Sweet Treat Train for birthday parties by adding cupcakes to the cargo cars!
Find these printable kits that you can download and make in my etsy shop here!
These little Happy house favor boxes can hold favors and gift cards!
My printable Church favor box goes perfectly with the happy houses so you can make an Easter village for your mantle! You can also use this little church for weddings or baptism parties too!
Add my Sweet Treat train with Easter eggs in the back to your Easter display and you have a super cuter spring theme!
Once Easter is over you can use your Sweet Treat Train for birthday parties by adding cupcakes to the cargo cars!
Labels: printable kits
free Easter bunny ears printable
I wanted to share a little gift with you! I've created a freebie bunny ears printable that you can download and make. Perfect for Easter or maybe just because you wish spring were here already!

It's such an easy project - it literally takes 1 minute to make. Just download, print, cut and fold!
Here's my friend Amy's adorable son, Alfredo modeling the ears for you! Thank you Alfredo for being such a good sport! Don't miss Amy's fabulous blog here!
CLICK HERE TO DOWNLOAD THE BUNNY EARS PRINTABLE! -- file is approx 2MB
To download from the preview widget above, click the arrow button on the bottom right. This will save the high res file to your computer and you will have beautiful bunny ears ready to print and enjoy! :)
Links to this freebie printable on pinterest, twitter, facebook etc are very much appreciated! Spread the word!
For more fun Easter, Spring (and any occasion printable kits) that you can download and make check out my Etsy store here!
Don't miss any freebies! Make sure to sign up for my email list here:
Here's my friend Amy's adorable son, Alfredo modeling the ears for you! Thank you Alfredo for being such a good sport! Don't miss Amy's fabulous blog here!
CLICK HERE TO DOWNLOAD THE BUNNY EARS PRINTABLE! -- file is approx 2MB
To download from the preview widget above, click the arrow button on the bottom right. This will save the high res file to your computer and you will have beautiful bunny ears ready to print and enjoy! :)
Links to this freebie printable on pinterest, twitter, facebook etc are very much appreciated! Spread the word!
For more fun Easter, Spring (and any occasion printable kits) that you can download and make check out my Etsy store here!
Don't miss any freebies! Make sure to sign up for my email list here:
Labels: free printable, printable kits
watermark resist stencil technique
I've got one more stencil tutorial video for you!
In this video I'll share with you a resist stencil technique using Ranger's Watermark Resist pad, Claudine Hellmuth Studio paints, and my new stencils with Ranger and the Crafters Workshop!
My new stencils are available in store now. Find them online at Ellen Huston, Simon Says Stamp and ask for them at your local Craft Store!
Labels: Claudine Hellmuth Studio, free tutorial
where women create business magazine
I love business magazines, if you look on my bedside table I have a huge stack of them. Inc., Fast Company Business Week etc so when I was offered a complimentary copy of Where Women Create Business to review I said "yes please!"

Where Women Create Business is the perfect blend of regular business magazines but with all the eye candy of Somerset Studio magazine. You are introduced to beautiful studio spaces with decorating advice for your home offices but don't let that make you think that this is a magazine without substance.
Within it's pages are great articles such as one by Kelly Rae Roberts on "finding your why" and advice on accounting, branding, product design and PR. I've had this copy of this issue for a couple months and I am still working my way through all the juicy nuggets! You can grab your copy of Where Women Create Business on your newsstand or online here.
Labels: reviews
 Name:claudine hellmuth