I'm supposed to be resting and relaxing on this trip, so I'll be keeping email and blogging to a minimum, but I'll be Twittering if you want to find out what we're up to! Happy New Year everyone! I'll be back on the 5th of January. See you then!
Labels: travel
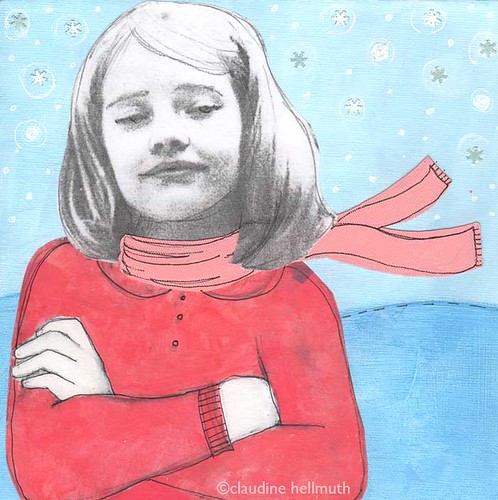
Here's an artwork I created of myself as a little girl wearing my favorite pink sweater! This artwork was featured in the Jan/Feb issue of Memory Markers Magazine in a feature article about my new book: The Scrapbooker's Creativity Kit. Six of us created artwork for the article using prompts from my new book. My prompts were FUZZY and PINK, which made me think of a fuzzy pink angora sweater that I had when I was little. I thought I was really hot stuff when I wore it -- so I wore it every chance I got. Never mind that it was itchy!
Wishing everyone a snuggly, happy holiday full of pink sweater memories!
Labels: holidays
- Ellen Hutson made a lovely Merry Christmas gift tag using Sticky Back canvas printed on her printer. Then she made a second canvas project using Studio Paints! Beautiful! Thank you also to Ellen Huston for carrying the Studio line in her online store!
- Linda Elbourne created beautiful holiday artwork with dimensional Sticky Back Canvas poinsettias!
- Michelle Bernard used Sticky Back Canvas on her winter coat to create a sweet embellishment!
- Tanya Watts made an amazing altered book from Sticky Back Canvas, Studio Paints and Perfect Pearls!
- Sharongoo shows samples from her upcoming class in January using the Studio product line. This looks like a really fun class!
- Becky Olsen created a super sweet Christmas gift set!
Labels: free projects

SUGGESTED SUPPLY LIST:
- Claudine Hellmuth Studio Paint in Modern Red, Classic Teal
- Claudine Hellmuth Studio Multi Medium (matte or gloss)
- Claudine Hellmuth Studio Paint brushes
- Claudine Hellmuth Studio Sticky Back Canvas
- A back pen (I like the Faber Castell PITT in size S)
- Hero Arts Gemstones
- Ribbon
- foam stamp
- letter rubber stamps (HeroArts)
- Ranger Archival Ink in Jet Black
 Stamp Claudine Hellmuth Studio Multi Medium onto StickyBack Canvas using a foam stamp.
 Add water to Modern Red paint, creating a watery "tea stain" mixture. Brush over your stamped canvas, revealing the image below.
 Cut the sticky back into two pieces and face them so that wrong sides are together.
 Run the Sticky pieces through the die cutter. Here I used Sizzix "Bird with Vine" die # 655541. If you are only making 1 or 2, You could also freehand cut your bird. But using a die is great when you plan to make a lot!
 Remove the paper backing from on side of the bird and place a small amount of batting onto the sticky adhesive
 Remove the paper backing from the other bird and then sandwich the two birdies together
 Before you seal everything up. Slip in a little ribbon on the top of the bird. Stan kept grabbing my ribbon away!
 Sometimes you need to reinforce the edges by gluing with a little Multi Medium, especially if you used a little extra batting.
Repeat the resist technique on another piece of Sticky Back canvas, this time using Classic Teal paint. Cut out shapes for wings. Then remove the paper backing and stick the wings on your birdie.
 Cut two "word bubble shapes" and stamp words on them using Archival Jet black ink and letter stamps (HeroArts) Here I've also added some black pen dotted lines and a Gemstone as an eye.
 Sandwich the two word bubbles sticky sides together, then open the beak to add it to your ornament
Add to your present for a unique gift tag + ornament! Happy Holidays!!
WHERE TO BUY:
Check your local crafts/scrapbook or arts supply store for availability. Claudine Hellmuth Studio Products are for sale online at these locations: Somerset Shoppe, ScrapLovers, Joggles Online, Schmooze with Suze, Scrapbook.com, Simon Says Stamp, Studio Calico, Scrap in Style TV . For more videos and information about the Claudine Hellmuth Studio product line, visit my web site!
Labels: free projects, free tutorial

I am going to giveaway two sets of cards from my Sweet N Sassy line with The Greeting Place. Just post a comment below and i'll pick two winners at random on Friday evening around 6pm EST!
EDITED 6:50PM FRIDAY DEC 19th -- WINNER ANNOUNCEMENT!
We have two Winners! AngelCat and BurningRubber. If you won -- email me your address and I'll get your prize off to you next week! thanks everyone for playing!


Labels: giveaway
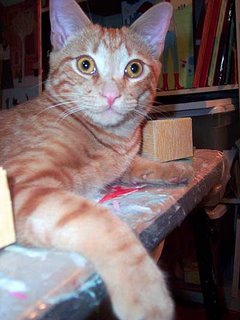 I took Stan to the Vet Cardiologist this morning. What an amazing facility! I have seen Dr's offices that are not this nice. The staff there is wonderful and so friendly. They have a cardiac ward, oncology and ophthalmology as well as Emergency. They have even thought of so many wonderful things like having a comfy blanket on the scale etc.
I went with Stan and the Dr into a little room where they did the echocardiogram. Just like on humans they used a non toxic ultrasound gel, which Stan wasn't all that happy about and spent a long time licking off later (Mabel helped clean up Stan too!)
The Dr went over the results with me and it wasn't what we had hoped. He does have heart disease, specifically Feline Hypertrophic Cardiomypathy. Apparently cats can get this type of heart disease and it usually onsets at age 2-4. He's on the young end at only two but we are hoping that will be in his favor and his youthful energy will help him rebound. He's already had some hardening in this heart muscle and we are going to try to reverse it with beta blockers. Some cats respond well to the beta blockers and can have a good life with medication. Others have a genetic predisposition to an aggressive form the disease and the medicine won't do much to help. We will find out in 3 months when I take Stan back for another echocardiogram if his heart is reacting well to the beta blockers. What a happy day that will be if that is the case!!
In all this sadness and worry there are things I am thankful for. I am so thankful that we caught this early. I am thankful that he has the kind of heart disease that has a possible chance of treatment, I am so thankful that there is amazing facility near by with wonderful Drs. to help us. So there is lots to be positive about!
Thank you so much for all your well wishes!!! They are so appreciated!!
Labels: pets
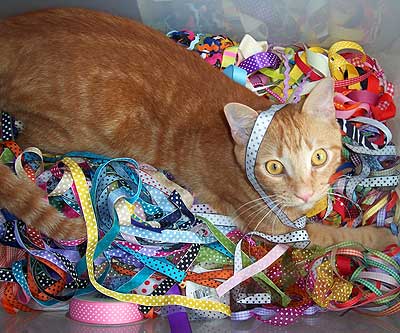 Last week when I took Stan to the vet for is usual regular check up it was discovered that he has a heart murmur. Grade 4.5 out of a 6. With 6 being the loudest.
Our vet recommended that we take Stan to the kitty cardiologist to have him further checked. Let me say how much I love our vet and am so glad I found her after moving here!!
Some murmurs can be nothing and something cats can live with for a long time. Or they can mean the beginning of heart disease. Of course when she says this, all I heard coming out of her mouth was heart disease and I was freaking out.
Oh no! My baby Stan who is only 2 years old!!
To make a long story short, tomorrow morning (Tuesday) I will take him to the kitty cardiologist who will take his blood pressure and give him a mini kitty echocardiogram. The good news is they don't have to put him under when they do this and I can be with him the whole time. I am a nervous wreck about it because tomorrow I will find out if this is something Stan will just live with or if this is a progressive disease that we will have to do our best to slow down however we can.
When I look at him running around like his usual crazy self and getting into mischief I can't help but think this has to be something he was born with and something he'll live with for a long time. He is not acting like a sick cat in any way. My Dad's cat lived to be 21 with a heart murmur! I even have a heart murmur too! This can NOT be heart disease, it just wouldn't make any sense, my Stanley is supposed to be around for a long time!.
I'll be Twittering tomorrow about it as I get news so Paul and my Mom can get updates. Every day is precious with your fur babies! Give them kisses whenever you can!!
Labels: pets
These pre-cut plexi pieces came as part of the kit and I glued the scrapbook paper to the back using Claudine Hellmuth Studio Multi Medium. I printed images of my pets Mable and Toby (I need to make one for Stan too!) then glued those down to the back of the plexi with more Multi Medium. The Multi medium dries perfectly clear so you can glue papers to the back of the plexi and not worry about it showing!
I used Modern Red, Landscape Green and Sky Blue paints from the Claudine Hellmuth Studio paint line.
A quick shout out to Jamie Zollars who I met at the Craft Muntiy show on Saturday! Check out her work! It's amazing!!
Labels: free projects
I did get out to play a little bit this weekend!! I have been getting cabin fever being here in the apartment almost 24/7 so Paul declared on Saturday that I needed to get out! We went to Georgetown and walked around while our car got an oil change. Makes me look forward to car oil changes if it means I get to walk around Georgetown and visit the Paper Source. There was a Craft Mutiny Show on and we got to stop by that too!
Saturday night we went to see the White house Christmas Tree. Looked at the Macy's holiday window displays and then walked back and had some hot chocolate by the fire place at the Tabard Inn.
Today I have been work work working and I see the light at the end of the tunnel and it feels so good! see you tomorrow!
PS thanks to Craft Zine Blog for the mention of my holiday tutorial!!
Labels: this and that
Just an update to let you know that I'll be doing a chat with Studio Calico tomorrow night at 10pm EST. All you have to do come and chat is register at Studio Calico! Hope to see some of you there!
Labels: this and that
Suggested supply list:
- Old Music papers and assorted scrapbook papers
- Claudine Hellmuth Studio Paint in Dash of Red, Landscape Green
- Claudine Hellmuth Studio Multi Medium (matte or gloss)
- Claudine Hellmuth Studio Paint brushes
- Claudine Hellmuth Studio Sticky Back Canvas
- Ranger Inkssentials White Pen
- A back pen (I like the Faber Castell PITT in size S)
- Pencil
- a BATTERY operated tea light candle (no flames please!!!)
- Template for the houses - I made one for you! Download here!
 STEP ONE: Put the house template (download here) on top of a sheet of old music paper and trace around it with a pencil and then cut it out.
 STEP TWO: Draw in where you would like the windows and doors to go.
 STEP THREE: Paint in the house. Paint around all the doors and windows leaving them unpainted. Here I am using Dash of Red from the Claudine Hellmuth Studio Line. If you are using these paints, you will notice that they remain transparent and you can still see the music notes even through the color, making a really beautiful effect!
STEP FOUR: Here I added details. I used Claudine Hellmuth Studio Sticky Back Canvas to make the curtains, a black pen and the Ranger Inkssentials White Pen.
 STEP FIVE: Fold all your edges and then glue the tab to the other side of the house with Claudine Hellmuth Studio Multi Medium.
STEP SIX: Pinch the sides to shape the house.
 STEP SEVEN: Place the roof template on a piece of scrapbook paper, trace around and cut out
 STEP EIGHT: Fold down the center and then add details. Here I added trim but cutting a piece of Sticky Back Canvas
 STEP NINE: Put the roof on your house and then place a BATTERY OPERATED tea light candle underneath. DO NOT use a regular tea light candle with flame because it will catch your mini house on fire! You can find Battery tea light candles at home stores like Bed Bath and Beyond, or at your local craft store.
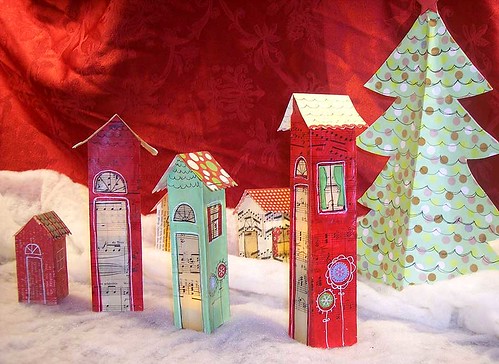
 YOU'RE DONE! Here's the little house ready to bring Christmas cheer! It was difficult to capture just how glowing the houses are with the battery tea lights underneath. When you make yours, you will see how magical they are!
 Now make a whole bunch more and display them on your mantle! A perfect Holiday Village for your home!
WHERE TO BUY:
Check your local crafts/scrapbook or arts supply store for availability. Claudine Hellmuth Studio Products are for sale online at these locations: Somerset Shoppe, ScrapLovers, Joggles Online, Schmooze with Suze, Scrapbook.com, Simon Says Stamp, Studio Calico, Scrap in Style TV . For more videos and information about the Claudine Hellmuth Studio product line, visit my web site!
Labels: Claudine Hellmuth Studio, free projects, free tutorial
Hope you had a super day. Wish I could have been in Orlando to celebrate!
xoxoxoxoxox
My good friend Bernie at A Place to Bark has lots of sweet furry babies that need your help! She's having an online art auction that runs right up until Christmas! A perfect chance to get a gift AND help the animals!
-----------
Here's some info from the A Place to Bark Web site:
It's called the Linked By Love Auction: Artist Friends of A Place to Bark, Dedicated to Saving The Lives Of Animals in Need.
This auction continue till December 25th in hopes of raising the funds needed to finish our shelter and help us catch up on some Mega HUGE vet bills. New items to be listed daily!!!
Many of the art pieces are published and won't be offered anywhere else, but in our auctions. Really FABULOUS Art!! Please bookmark the link, check back often & help spread the word!!!! Christmas is coming, so now is the time to treat yourself or someone you love to a very special artful present and in turn help us continue on saving more animals in need.-------------
Help spread the word!!! happy holidays!!!
Labels: pets
I hear we might be getting snow flurries on Sunday. Very exciting for this Floridian. I think it might be an excuse to get another scarf!
A few linky shout outs of bloggers who have used the Claudine Hellmuth Studio products to make projects:
- Ellen Hutson made a beautiful poinsettia brooch + card inspired by my blog tutorial, but she put her own amazing twist on it. You have to check this out!
- Kim Parkinson made a magnet version that is just fabulous! Love the two totally different takes on the poinsettia idea!
- Scrap Allier made a collage using cut paper, Studio paints and used Sticky Back canvas to create dimension. love it!
Also a linky thank you to Simon Says Stamp for carrying my entire product line!
Next week I'll have another tutorial on my blog and at least one giveaway planned, so check back!
Labels: Claudine Hellmuth Studio, free goodies, free tutorial
- Patti Behan has created embossed metal Christmas ornaments using my paints, check out her blog, with two videos and full instructions to download!
- Suze Weinberg and Judi Kauffman teamed up to make bracelets out of Epson printed Sticky Back canvas (yes! you can run the Sticky Back through your printer!) Check it out here!
- Michelle Renee Bernard made the cutest little snowman assemblages with Sticky back Canvas awnings. I want one of these!!
Also thanks to craft Critique for the great review of my line!
If you make a project and show directions on your blog using my products. Let me know and I'll post it to my blog!
Labels: Claudine Hellmuth Studio, free projects, products
And since it's the 2nd of December - we have a TWO giveaways planned! One here on my blog and on the Hero Arts blog so make sure to visit both to enter to win. You can find our more about the contest at the end of this post!
 Here's a little card + brooch that I whipped up! See the flower on the card? It's also a brooch!
 The card has a cute little brooch on it that can also be detached and the recipient can wear it after they receive the card! A card + gift in one! What could be better?!
Here are the supplies you'll need: Hero Arts Flower Blossom Border set (CL223), Hero Arts Smooth Gemstones (CH153), Hero Arts Holiday Mixed Notecards (PS539), Claudine Hellmuth Studio Sticky Back Canvas, Claudine Hellmuth Studio Paints in: Painterly Pink, Landscape Green and Modern Red, Claudine Hellmuth Studio paint brush set, Ranger Inkessentials Non-stick Craft sheet, Claudine Hellmuth Studio Multi Medium, a pin back, Ranger Archival Ink in black, Perfect Pearls, Perfect Medium Pen, and the Cuttle bug!
OK! Let's get started!

First, paint a sheet of Sticky Back Canvas using Painterly Pink, Landscape Green and Modern Red. Set aside to dry. Or speed drying using a heat tool.
 Stamp image from Hero Arts Flower Blossom Border set (CL223) using Ranger Archival Ink in Black on each color stripe you made on the Sticky Back Canvas.
 Flip your sheet of Sticky Back Canvas over, remove the paper backing revealing the sticky backing. Cut a piece of decorative fabric and place it onto the sticky side of the Sticky Back. Smooth to make sure there is good contact!
 Now that the fabric is on the back, go ahead and cut out the flowers from Sticky Back Canvas
 Glue all the layers together using Claudine Hellmuth Studio Multi Medium in Matte. here I also glued on a small circle of the dotted fabric in the center.
 You can curl the ends of your flower to give it dimension, just roll it over a paint brush handle and it will hold the shape!
 Glue on the pin back to the back of your flower using Claudine Hellmuth Studio Multi Medium in Matte. make a big blob, squish the pin back into the medium, then smooth it out using your paint brush.
 Here's a closeup of the pin back glued on with the Multi Medium. Once this dries it will dry clear and it will be on there forever! Make sure to let it dry all the way. it will only have a secure hold once fully dry.
Stamp an image from the Hero Arts sheet a couple of times onto a green card from the Hero Arts Holiday Mixed Notecards (PS539) Add stems using a black pen. Then set aside, we'll come back to this card later!
 Paint another section of Sticky Back Canvas using Modern Red. Allow to dry.
 Once dry, run the Sticky Back Canvas through a Cuttlebug using one of the embossing folders
Outline some of the embossed areas using the Ranger Perfect Pen in clear
 Dust lightly with Perfect Pearls to add a metallic shine! Ohh pretty!!
Trim and stick to the card you stamped earlier
 hold your pin up to your card and make marks where the pin will go. Punch these with an 1/8 punch then thread your pin through your card and you are done!
 Pair with a red envelope and send to a friend! I hope you enjoyed the tutorial!
FREE GIVEAWAY!
OK! Let's get to the contest!!! It's easy to enter! Just post a comment below and you'll be entered to win this prize from Hero Arts!

A winner will be selected at random using the random number generator at random.org on Friday December 5th at 9pm EST!
But wait! There's MORE!!
On the Hero Arts Blog you can win a pack of my Sticky Back canvas. Click here to visit the Hero Arts Blog to enter!
Happy December!
WHERE TO BUY:
Check your local crafts/scrapbook or arts supply store for availability. Claudine Hellmuth Studio Products are for sale online at these locations: Somerset Shoppe, ScrapLovers, Joggles Online, Schmooze with Suze, Scrapbook.comFor more videos and information about the Claudine Hellmuth Studio product line, visit my web site!
CONTEST IS CLOSED!! EDITED DECEMBER 5th 10pm:
We have a winner!!! Chosen using the random.org number generator was number 189, Which is Ev! EV email me your address and we will send you the Hero Arts Prize!

Thanks for playing everyone! I will have more giveaways next week!! See you then!
Labels: Claudine Hellmuth Studio, free goodies, free projects




 Name:claudine hellmuth


